Showing posts with label laundry. Show all posts
18 October 2013
the one... with my new steam mop
Is it odd to be excited over a steam mop? OK don't answer that!
To some my excitement may seem strange but I don't care cause I love this baby!
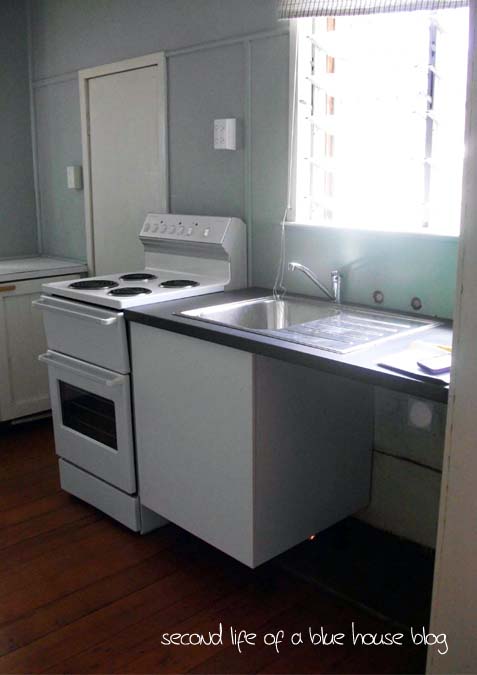
The cottage has gorgeous wide timber floor boards that have held up pretty good considering they were first polished 20 years ago but then they had been hidden under carpet and lino before I came along.
Purchasing a steam mop had been on my mind for quite a while but there always seemed to be something else that needed to be purchased first.
I picked this little beauty up at Harvey Norman on a research mission for a TV entertainment. Yep I walked in looking for one thing and walked out with something completely different.
It was on sale $100 it's original price was $169 and was given a further $10 discount because it was their last one and it was floor stock. I'm in no way complaining about the floor stock because it was never used, there was no box to throw out and there was no assembling required. Bonus!
Lisa xo
Labels:
laundry
7 May 2013
the one... with an update on the laundry
All of my attention hasn't just been on the kitchen lately, the laundry has also been getting some attention.
I've managed to get the cupboards attached to the wall and install the bench top with the help of mum and dad. Honestly, there was no way I could pick this bench top up on my own.
The good news is it's finally a fully functioning room with the plumbing all connected. My plumber very kindly cut the hole for the sink and sealed it into place for me, thanks Ros. I've been very lucky with my plumber who has gone that extra mile for me.
There is still lots to do like install the cupboard doors and put up some shelves on the wall but it will happen.
Lisa xo

Labels:
laundry
20 March 2013
the one... with the laundry floor
Work on the laundry has come to a stop but that is only temporary so I thought this is the perfect opportunity to bring you up to date.
You can see the mess I'm starting with. The room became the place to put all those bits and pieces I didn't want in the house but didn't want them out in the garage. Things like the sewing cabinet, vacuum cleaning and new blinds I bought for the veranda but haven't put them up yet.
The first thing I wanted to do was paint the floor. Originally I had thought I would tile the floor but then I realised that with the tile, it would take up the floor height. That's a toe stub just waiting to happen so then I thought, why not paint it.
I took everything out of the room and give the room a good vacuum. Then came a coat of undercoat.
It didn't take very long for the undercoat to dry before I started on two coats of the topcoat. I'm using the same paver paint I used on the front porch.
Once the floor was dried I got started on attaching the cabinets to the wall. The cabinets are from Ikea. Does anyone else have problems with the legs falling out?? I ended up sticky taping them to the base so I could move them around and in to position without them falling out every time you moved.
Can you see the little white dot on the floor? Well it turned out the builder had to come back and seal up a leak in the new roof... three times!!! So far so good.
Lisa xo


10 October 2012
the one... where I paint the laundry
I typed the title to this post before the painter Nigel asked if I wanted him to paint it.
I honestly hadn't thought about him doing it. I don't mind painting but working 5 days a week full time I didn't know when I would get to it.
Go ahead I said.
I left for work with it looking like this
This is what I came home to.
He also painted inside which I'm not ready to reveal just yet.
See the plant in the plastic bag, my aunty and uncle gave it to me to celebrate the renovations. It's my favourite plant, a yesterday, today and tomorrow.
Labels:
laundry
2 October 2012
the one... with the laundry revealed
Here is my new laundry. Well I can show you the walls at least.
It wasn't part of the original quote but I've asked the builder to line the internal walls, they put down flooring over the timber so I can tile the room and they even gave me a little window for free, apparently it was just lying around (thanks guys).
If you are building or renovating I can't tell you how important it is to treat your builders well. Be genuine about it, they can tell. I had a great bunch of guys who did a fantastic job. If I had a question or problem then I could chat to the project manager. He was there every morning to go through the day with me and then instruct his guys on what needed to be done. It also doesn't hurt to feed them. I can highly recommend muffins in the morning.
Lisa xo
Labels:
laundry
7 September 2012
the one... with the savings
Something un-house painting related...
I stumbled across a blog post recently that had a recipe for your own fabric softener. At the time it was on my shopping list so I thought I would give it a try.
I found the recipe here:
Here is what you need:
I had the white vinegar and obviously I had the hot water. I just had to pick up a cheap bottle of hair conditioner (this is where you pick whatever fragrance you prefer - I chose apple).
It's very simple to make, just measure and mix the ingredients together in a large jug which has a spout to let you pour into your storage jars. The conditioner will look very strange when added to the water and vinegar but give it a stir to combine. Then pour into your storage container. I ended up using the empty store bought bottle.
The above measurements filled a 750ml bottle plus extra.
I stumbled across a blog post recently that had a recipe for your own fabric softener. At the time it was on my shopping list so I thought I would give it a try.
I found the recipe here:
![]() |
Fabulessly Frugal Blog |
- White Vinegar x 1.5 cups
- Hot Water x 3 cups
- Hair Conditioner x 1 cup
I had the white vinegar and obviously I had the hot water. I just had to pick up a cheap bottle of hair conditioner (this is where you pick whatever fragrance you prefer - I chose apple).
It's very simple to make, just measure and mix the ingredients together in a large jug which has a spout to let you pour into your storage jars. The conditioner will look very strange when added to the water and vinegar but give it a stir to combine. Then pour into your storage container. I ended up using the empty store bought bottle.
I'm now on my second batch and have had no problems or build up on the towels (I think how the towels feel is a good indicator when it comes to trying new products).
Lisa xo
Lisa xo
30 August 2012
the one... with the hot water system moved
The hot water system has been moved. Done!
They were previously between the concrete tubs and the back patio - can you see the white underneath the patio on the left, yep that's it.
The plumber got to work and moved them to their brand new home beside the house on the East side.
I really want to do something with the old tyre rim which was used to hold the hose in a previous life.
The only downside is there was a casualty.
The old cement tubs didn't make it. I was disappointed because I really wanted to reuse them in the yard - they were over 60 years old!
They were previously between the concrete tubs and the back patio - can you see the white underneath the patio on the left, yep that's it.
The plumber got to work and moved them to their brand new home beside the house on the East side.
I really want to do something with the old tyre rim which was used to hold the hose in a previous life.
The old cement tubs didn't make it. I was disappointed because I really wanted to reuse them in the yard - they were over 60 years old!
27 August 2012
the one... with the hot water on the move
Now that I have given the builders the go ahead on the deck there are a couple of things that need doing before they can start.
- Move the hot water system. In its current location it would be right underneath the new deck.
- Cap the laundry plumbing until the new laundry is ready.
- Remove the 'smell' down pipe from the back otherwise it will be right beside the new back sliding door and go up through the new deck - the plumber is taking a look at this first because you must have at least 1 smell pipe (I have 2 - even for such a small place) and to remove 1 they need to be within 10metres of each other.
- Replace the other 'smell' down pip on the East side, it was falling down.
replace the side down pipe - another 'smell' pipe |
down pipe on the far left |
possibly remove the 'smell' down pipe |
hot water system and old laundry plumbing |
3 July 2012
the one... with the best of June
Can you believe it's July already?!?!
The new financial year has begun and we start the countdown to Christmas.
As the new month starts I thought it would be a great time to pull a few favourite posts from June.
The new financial year has begun and we start the countdown to Christmas.
As the new month starts I thought it would be a great time to pull a few favourite posts from June.
![]() |
the one... where I can wash inside |
the one... with the backyard makeover |
the one... with the garage makeover |
![]() |
the one... with the handle |
the one... with the quick project |
the one... with the other side |

18 June 2012
the one... with the handle
I took a trip to Ikea a few weeks ago and finally bought a handle for the kitchen cupboard.
Yes just one. Well actually it's a pack of 2 but I only need one.
Before I moved back in and while there was still a tenant, I thought it was a good time to have all of the plumbing replaced throughout the house, from the street to the house along with replacing the cupboard, sink and counter you can see here.
At the time I didn't pick up the handle - honestly I forgot, it wasn't on the shopping list!
Anyway, so I just went without one... until now.
While I was at Ikea I also picked up a FIXA Drill Template. This would have to be one of the best plastic tools you can get and for only $1.49 why wouldn't you.
![]() |
photo from Ikea |
Firstly, I gave the cupboard a good clean with some warm soapy water and allowed it to dry.
Then I got out the little Ikea tool and measured the handle against the holes - the instructions said to measure 16cm between the screw holes so I did that and placed little pieces of sticky tape (clear tape obviously so sorry that you can't see it in the photo) on either side of the holes where I wanted to drill.
I then placed the tool against the door - I decided I wanted the handle to be vertical. You can see here how easy it is to place the tool against the door and mark with a pencil where I was to drill.
Next came the drill. I'm in love with my new drill.
![]() |
I think I had a smudge on the camera lense in this photo, oops! |
What took me so long. This project was so simple and I'll admit if it wasn't for the Ikea tool it would have taken longer.
Please ignore the dishes on the sink |
![]() |
this is the cupboard now |
Did you notice the droop in the door? Yep, that's on the to-do list now.
11 June 2012
the one.. where I can wash inside
Many old Queensland homes tend to have the laundry under the house or in a room outside which means it's no fun having to do the laundry when it's raining or at night.
Well I recently changed that!
I have moved my washing machine from it's outside room into the kitchen.
This is what I was working with in the past.
A big plus was the size of the room. I loved that I could hang all my washing inside and never have to think about the weather but it is very old (an extension built in the 50's).
Here is the kitchen as it was, before the washing machine. See the gap there, well I was planning on putting in a new dishwasher but the washing won that fight... for now.
Before the machine could be moved into its new home I wanted to paint underneath the sink - there was a good chance it wasn't going to be seen once the washing machine was in place but it made sense to do it now.
I got out my trusty little mouse sander - I'm a girl who loves her tools.
I first started by sanding down the back and side walls to remove any bumps in the old paint. You have to remember that this part of the kitchen was hidden up until recently behind the old cupboard for many, many years. I then vacuumed to clear away the dust before I gave the walls a good wash with sugar soap. I allowed this to dry before I applied two coats of undercoat and it wasn't long before I was applying two coats of paint.
I forgot to take a progress shot at this point but all you would have seen was a white wall so close one eye and tilt your head to the right... can you see it?
With such a small space the whole job only took a few hours.
This is the machine in its new home.
As I mentioned before the washing machine has taken up the space I had intended for a new dishwasher (I've never had a dishwasher... sad I know but true) but when I weighed up the pros and cons.... I would rather do a few extra dishes by hand than do the washing outside (I say this as we begin Winter).
It may seem minor but I love being able to do the washing inside and at anytime, day or night!
Well I recently changed that!
I have moved my washing machine from it's outside room into the kitchen.
This is what I was working with in the past.
This room will be no more soon |
Here is the kitchen as it was, before the washing machine. See the gap there, well I was planning on putting in a new dishwasher but the washing won that fight... for now.
Before the machine could be moved into its new home I wanted to paint underneath the sink - there was a good chance it wasn't going to be seen once the washing machine was in place but it made sense to do it now.
I got out my trusty little mouse sander - I'm a girl who loves her tools.
![]() |
photo: Black and Decker |
I first started by sanding down the back and side walls to remove any bumps in the old paint. You have to remember that this part of the kitchen was hidden up until recently behind the old cupboard for many, many years. I then vacuumed to clear away the dust before I gave the walls a good wash with sugar soap. I allowed this to dry before I applied two coats of undercoat and it wasn't long before I was applying two coats of paint.
I forgot to take a progress shot at this point but all you would have seen was a white wall so close one eye and tilt your head to the right... can you see it?
With such a small space the whole job only took a few hours.
This is the machine in its new home.
It may seem minor but I love being able to do the washing inside and at anytime, day or night!
Subscribe to:
Posts (Atom)
AddThis
SHARE